
How to stop Windows 10 automatically update
The biggest change in Windows 10 over older version of windows, for Gamers with Direct X 12, improves windows stability, security and make simple and interactive interface over windows 8.1 just like windows 7. Microsoft Cortana, the voice control virtual assistant just like Siri and Internet Explore Edge gives faster browsing experience all those features gives more comfort.
In Windows 10 Pc automatically check and install updates on windows without any user permission. In windows 10 Professional, Enterprise and Education edition have local group policy and registry setting access , but in Home Edition it gives the option to stop update (automatically downloading).
If you have limited data connection and you don’t want automatically windows 10 downloading updates, just set as metered connection, when you setting back it to unmetered connection Windows 10 remember these setting for each network. It will automatically download updates when you connected over unmetered connecton.
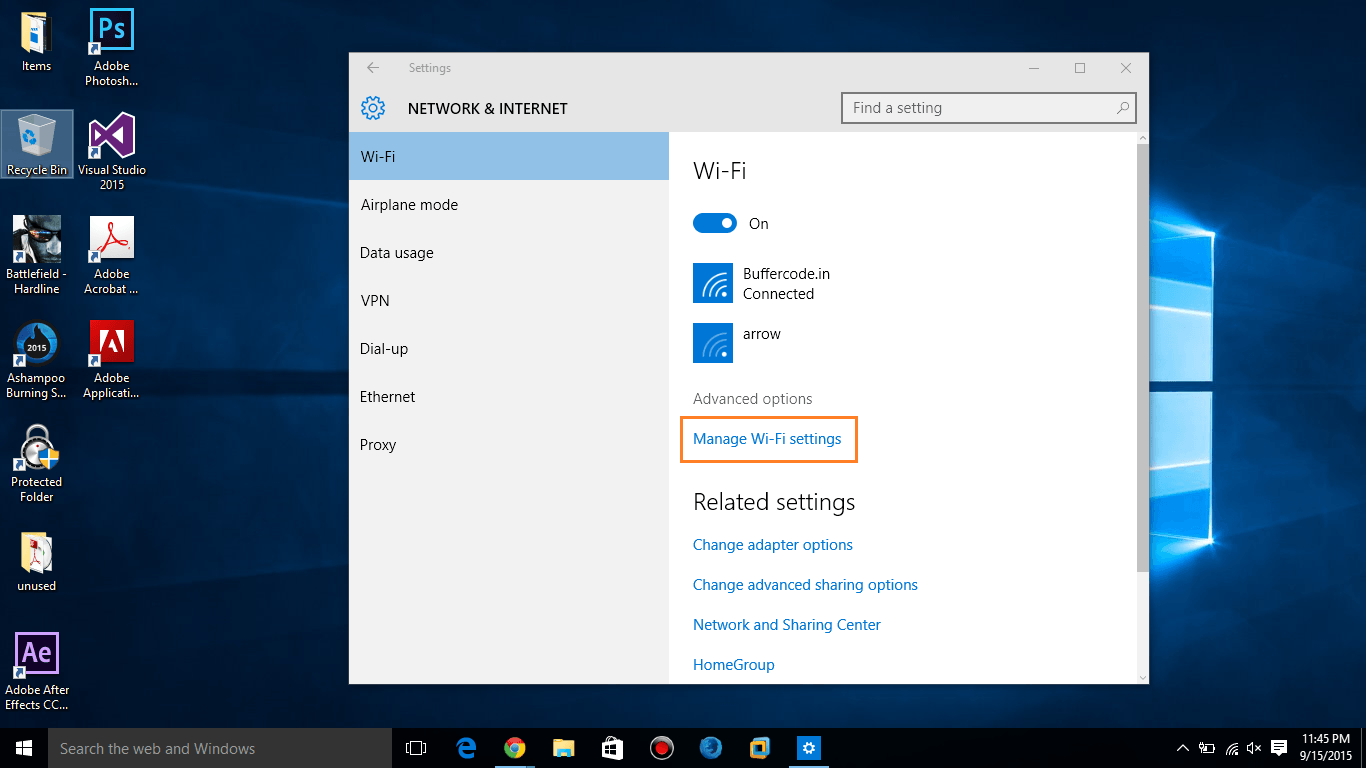
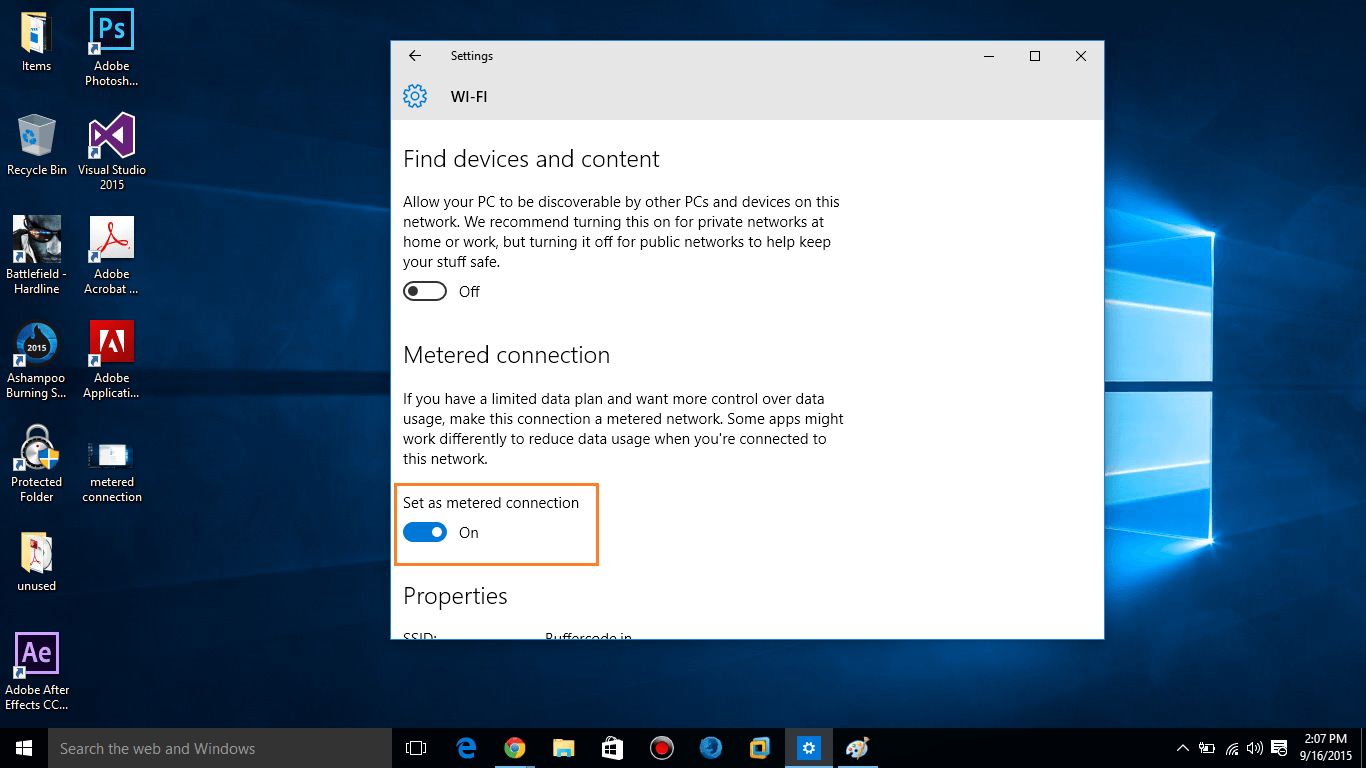
To enable Metered connection setting, open the setting application, select Network & Internet, select Wi-Fi, then scroll down and select Advanced option and then you can change Metered connection setting as per your preference, but windows remember this setting for each individual Wi-Fi network.
After it when you enable Metered Connection Windows update will say Updates are Avaliable, if you want to download update just click on Update button.
Using User Group to Disable Automatic Updates Downloading
To open Local group policy editor, first you need to open Run just press Windows key + R, this will open windows 10 Run dialog, to open Local group policy you need to enter gpedit.msc command into run dialog and press enter.
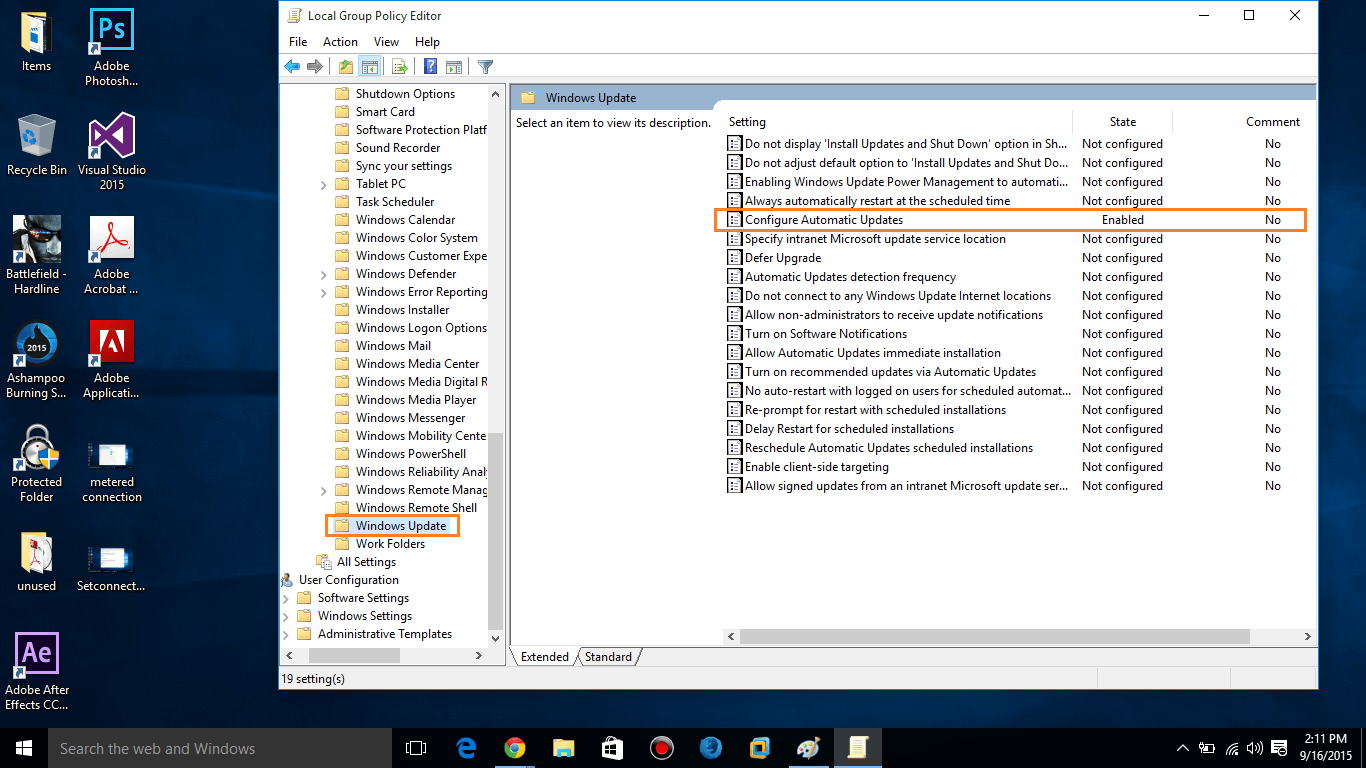
After that a new window will open named as Local Group Policy Editor , Select Computer Configuration, in computer configuration –> Select Administrative Templates –> select Windows Components and then scroll down and select Windows Update. After open Windows Update in Local group policy editor you will see many option, select Configure Automatic Updates setting in right side panel, and double-click on it.After that a new setting window will open Choose Enable Option placed on right side. Then you can choose setting as per you preference e.g “Notify for download and notify for install” or “Auto Download and notify for install” or “Auto Download and schedule to install” or “Allow to local admin to chosen setting” select one of them and save the changes.

After the changes perform in Local Group Policy Editor, Visit to Windows update and then select Advanced option, now you will see new open and message “Some setting are manages by your organization.”
To reset your Local group Policy again you go back to Computer Configuration/Administrative Templates/Windows Components/ Windows Update/Configure Automatic Updates and set it to Not configured.
Using Registry to Disable Windows 10 Automatic Update Downloading
To Open Registry editor , press Windows button + R this will open the windows registry editor, select and expand HKEY_LOCAL_MACHINE then select SOFTWARE and expand it, then go to Policies\Microsoft\Windows\WindowsUpdate\AU ,Select AUOption placed on right side, edit on it with one of the following value.
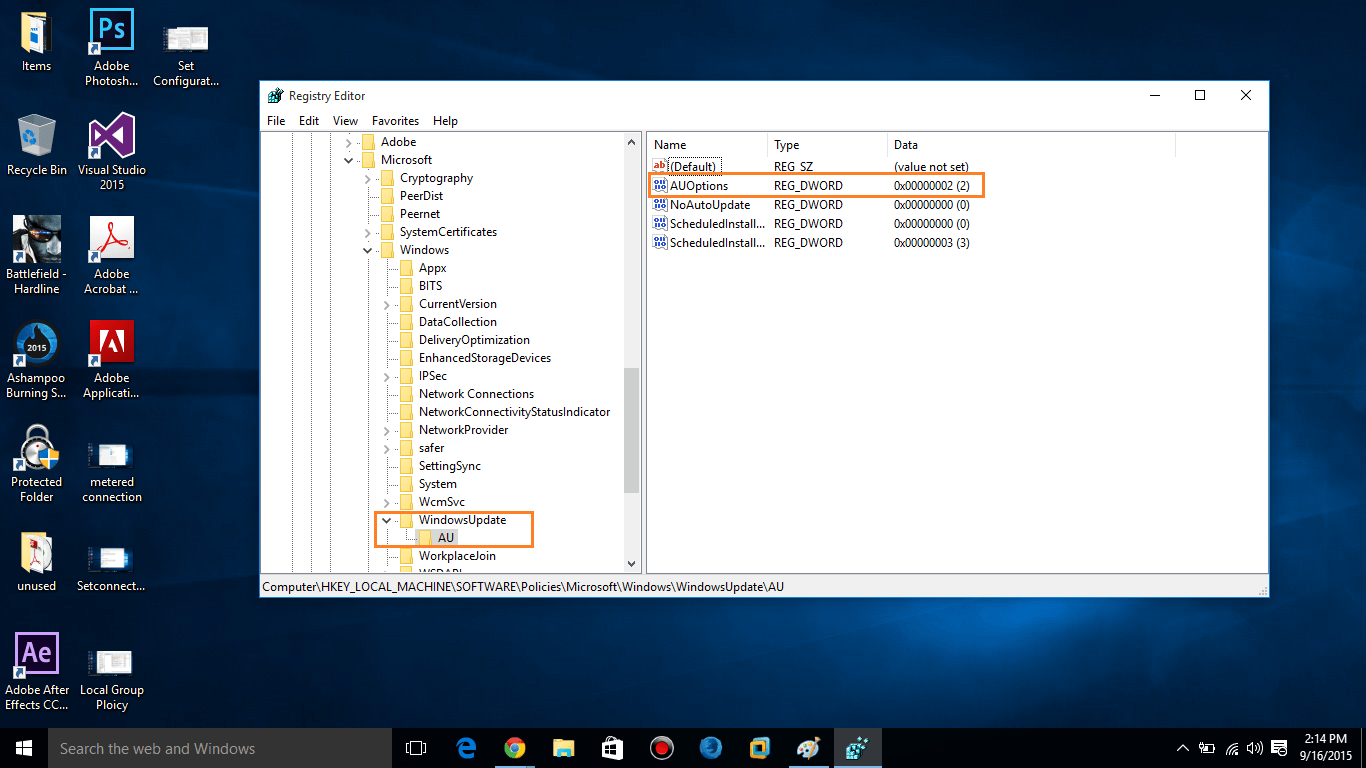
00000002 ( for Notify for download and notify to install )

00000003 ( Auto download and notify to install )

00000004 ( Auto download and schedule the install )
This Registry trick will do same thing as above in Local group policy setting.
Have something to add Stop Windows 10 automatically update ? Please add in comments.
Follow us on Facebook, Google Plus and Twitter to get more Tech News and reviews.


