If you read our previous post ie., Best C / C++ Compiler : Compilation using gcc , it means now you are in love with C-programming. Well today we are going to tell you about compiling with VS (Visual Studio ) an ultimate tool for windows user .
VS ( VIsual Studio ) an ultimate tool for windows programmers
Well I never consider VS as a best compiler because it’s codes are not platform independent , it simply means that if you write a C program for windows using Visual Studio or turbo C/C++ , you can’t run them on Linux or mac OS . You need to change those code, that’s why I prefer gcc / g++ GNU Gross Compiler as best C/C++ compiler . You don’t read to recode your previous code . Just write it once and use anywhere. GCC is customizable too .
Still users who are ASP.NET programmers or who use c# (C Sharp or Visual basic ) are very familiar with Visual Studio and they don’t want to work with gcc . One more thing with visual studio is , it is not only compiler but also a full IDK( Integrated Development Kit) . There is no need to use any IDK if you are working with Visual Studio. If you are using Visual Studio Ultimate or Pro addition , you can programming for ASP.NET web app development , Directx ( Graphics with C for windows) , C# and many more . It have very good inbuilt environment for programmers.
Steps to compile C code with visual studio
It’s too familiar for ASP.NET or c# or visual basic programmers but for C programmers who use Turbo C for compilation ,it is a little bit new but exiting process . So follow the process step by step.
- Press ctrl+s to Open search , now search for Visual Studio 2013 and Open it.
- Now press ctrl+shift+N to create New project.
- Click on templates and then on visual c++ as shown in step 1 in fig below .
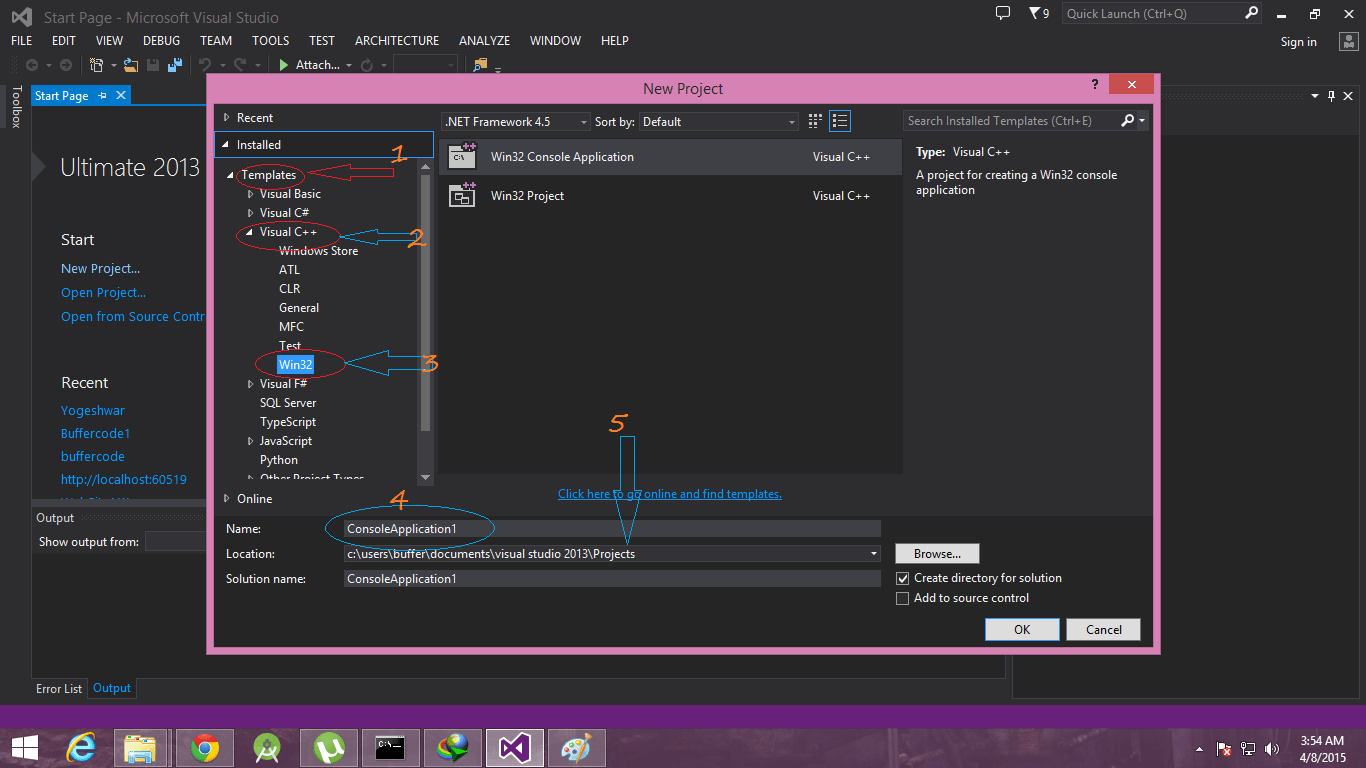
- Now select Visual c++ ==> Win32==> win32 console application as shown in step 2 and 3 .
- Now just change the name of project and location as shown in step 4 and 5.and just click on ok
- A new window will open , now just click on next and select Empty project (Warning:Don’t select Precompiled header, it will make your code more dependent) as shown in image below.
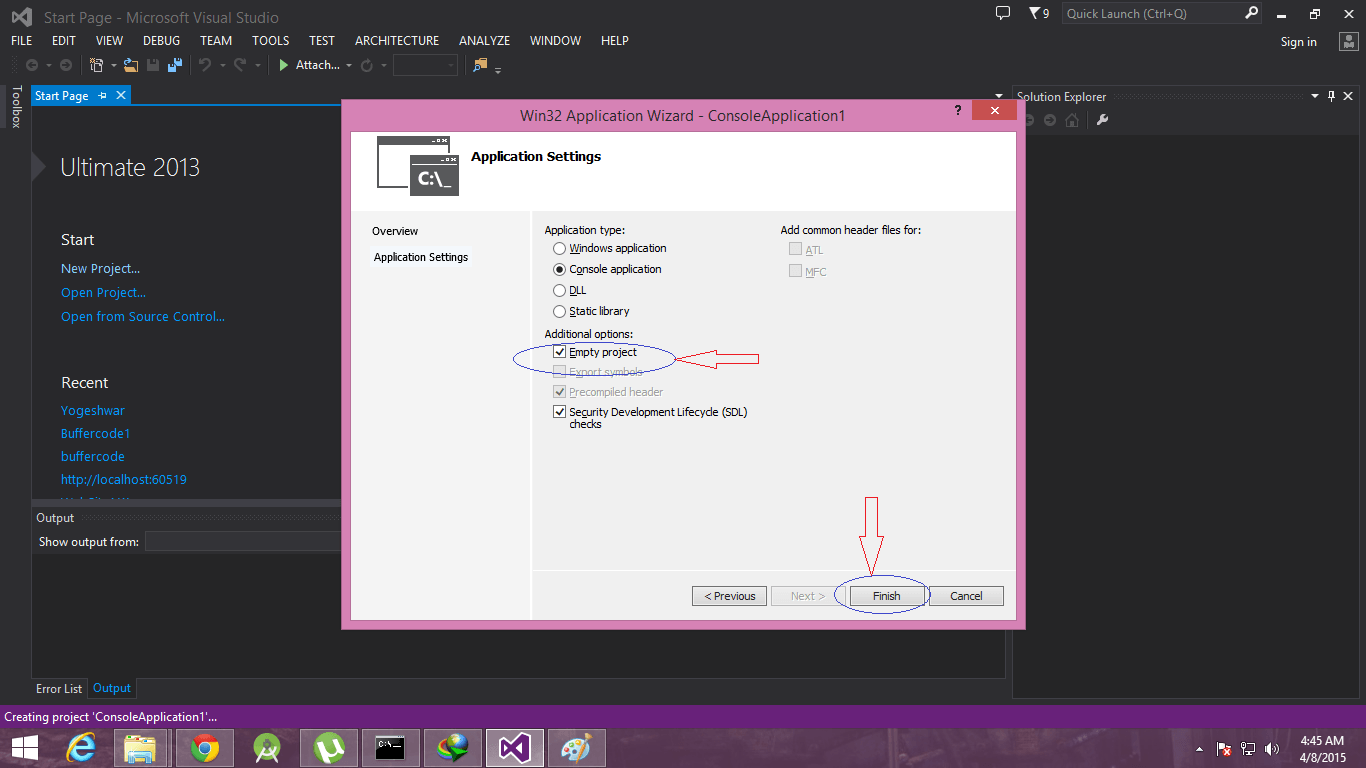
- Now all is done 😀 . Just click on Finish as shown in above image .
SEE ALSO:On 40th anniversary of Microsoft Bill Gates sent out a letter to employees.
Create Cpp file using Visual Studio
- Right click on your project in solution explorer ==> Hover on Add ==> Click on New Item as shown in left screen of below image.
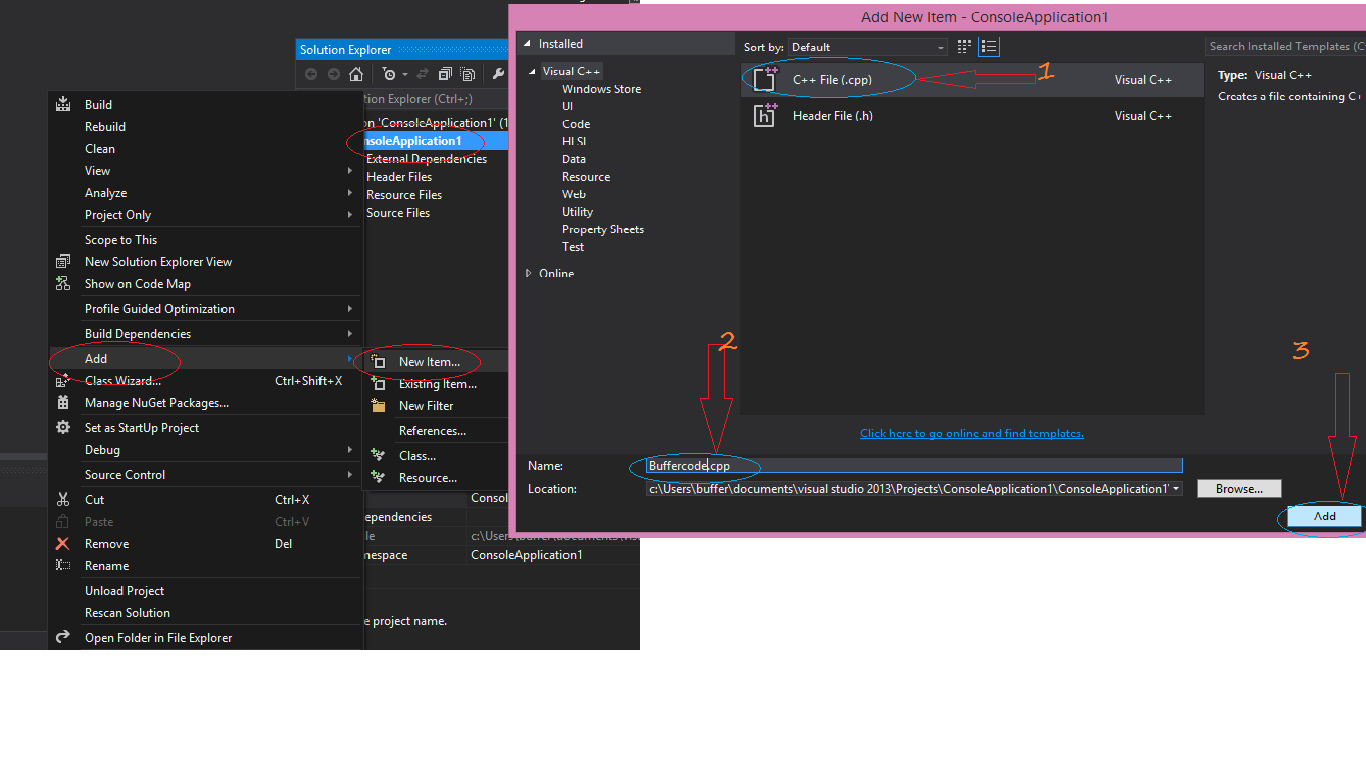
- Click on c++ File and change name of your file as buffercode and click on ADD.
- Write your code :
#include<iostream> #include<conio.h> using namespace std; int main() { printf("\nHello Buffercode"); printf("\nEnter any key to exit"); _getch(); return 0; } - Run it by click on local window debugger as shown in below image .
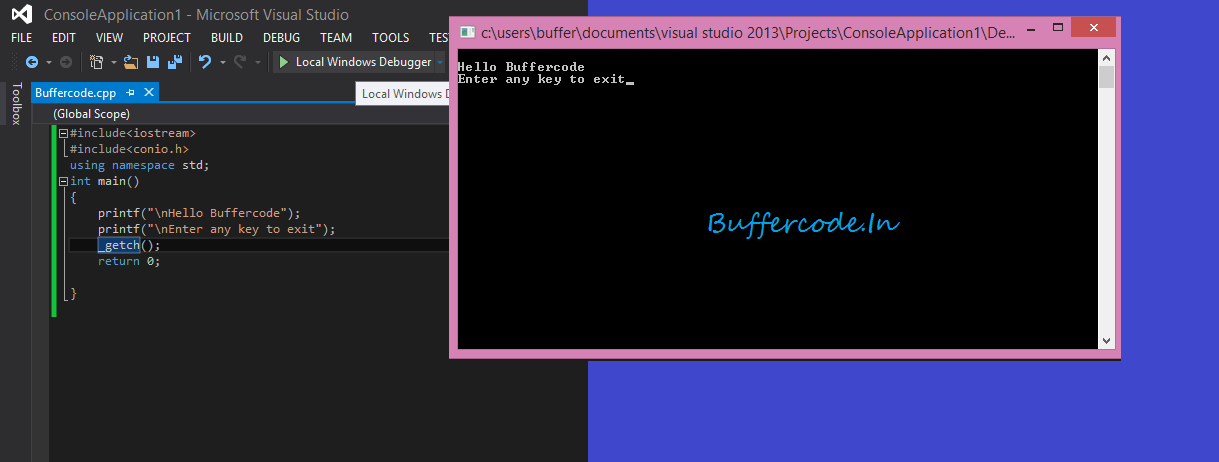
- Woooooooooh All is done now , it’s time to buffer your code 😉
Building C/C++ code on the Command Line using Visual Studio for windows
We learnt a lot today ,just last thing is remaining to run your code using command line from Visual Studio Compiler. It’s necessary to learn about it because some time we need to give input using command line as we use here .
It’s too simple to building a C/C++ code on the command line using Visual Studio(vs) compiler.
Steps for Building C/C++ code on the Command Line using Visual Studio for windows
- For that first write your code in notepad or in any editor (Save it as Buffercode) and put it into a new folder named Buffercode in C directory.
- Now go to the location C:\Microsoft Visual Studio 12.0\Common7\Tools\Shortcuts and open Developer Command Prompt for VS2013
- Go to the location of Buffercode using cd command
cd C:\Buffercode
- Now Enter command
cl Buffercode.cpp
Buffercode
- All is done Now 😀
SEE ALSO : Learn Hacking For free on Buffercode
Have something to add to this story or stick somewhere ? Share/Ask into comments it in the comments.
Follow us on Facebook, Google Plus and Twitter.

