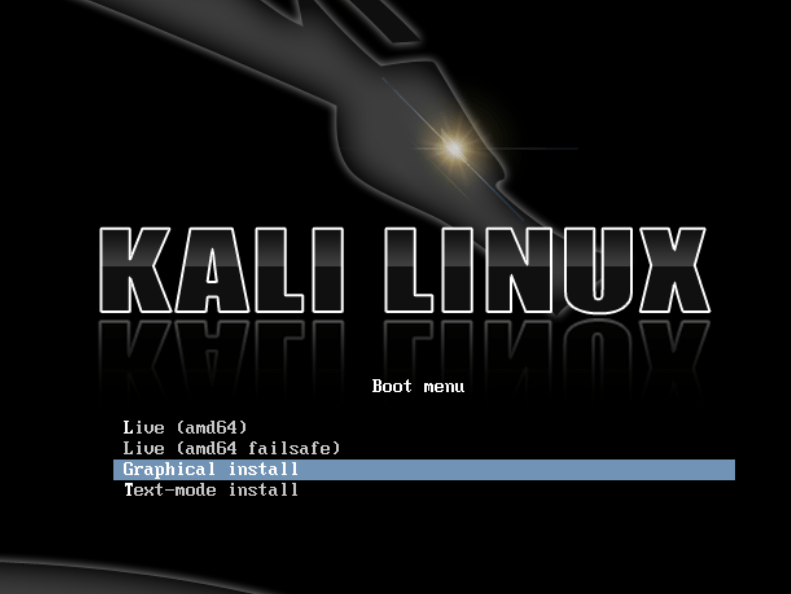
 Before start Complete Guidance to Install Kali linux in Dual Boot Mode without any Problem remember it’s slogan:-
The Quiter you become ,the more you are able to hear
Do you want to learn Hacking ?? If you are here it means you want. So I think this is the right time to do something with Kali Linux after successful installation .Let’s start how to install Kali without any pre-knowledge and without any problem. We are just taking out few simple steps for installation .First you’ll need a compatible Computer Hardware. Kali support i386, amd64, ARM architecture . Both i386 (32-bit ) and amd64 (64-bit) .Installation are same in almost all cases but in ARM it is little bit different from 32-bit and 64-bit because it is a low configured Hardware.
We will install Kali Linux alongside with Windows 8.1, where windows already has taking 100% of the disk space in our computer. We will resize our current windows partition and then proceed to install Kali Linux in a newly created partition which should be empty.
Download Kali Linux form its official website. Now either burn ISO to DVD or prepare a USB as the installation medium or another option is by using network installation.
Kali Installation Pre-Request
- Minimum 8GB pen-drive.
- Free Internal Disk Space.
- At lest Dual-Core (either intel or AMD) with minimum 1GB of RAM.
- Some Patience .
Preparing for the Installation
- Download Kali Linux (According to your Hardware Support).
-
Burn Kali Linux ISO to DVD or by using the bootable usb drive as shown in blow steps (Pen-drive or other portable device)
Here we write the Procedure to Install Kali Linux . We refer USB drive because it is easy to write and much faster then DVD .
Steps for making bootable USB/Pendrive for Kali Linux installation
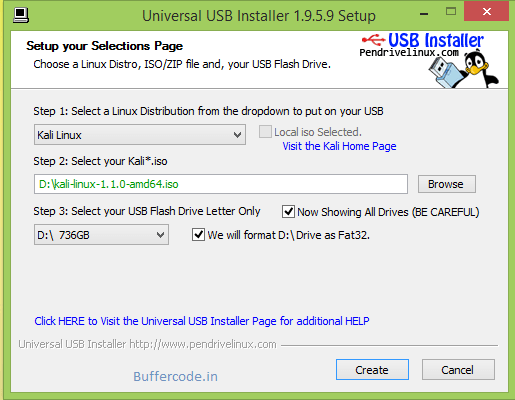
- Download Universal Installer and run it from here .
Select Kali Linux on 1st Drop-down menu(step 1).
Browse your Kali Linux iso file where you Downloaded it on your hard disk.
Check to Box(Now Showing All Driver) if your USB not visible on Drop-down menu.
Check to format USB disk as shown in fig below.
After done the all above procedure click on Create button to initiate the process to copy Kali LInux to USB Disk by making bootable.
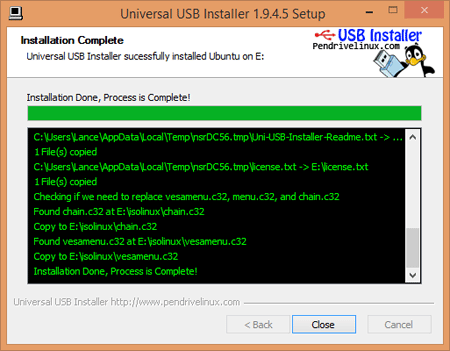
it will take some time 5-10 min according to your pen-drive and hardware performance.After the completion of processing it’s time to start Booting process using pen-drive
Making Partition by two different methods
For Dual Boot installation use Windows Partition manager or Gpartition ,it’s steps are shown below.
1. Procedure to Shrink Partition using Windows Partition Manager
- Right Click on Computer or My computer
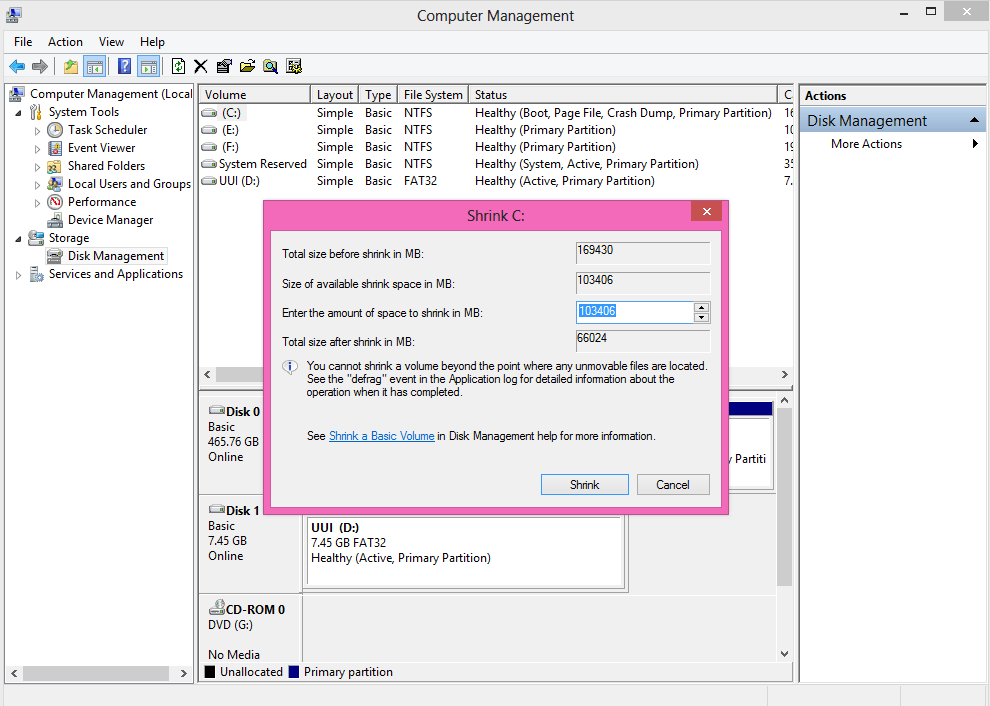
Click on Manage option as shown in fig. below.
Go to Storage>Disk Management using left side Explore Panel.
Double Click On Drive (C:) select Shrink Volume option.
Shrink You windows Partition according to your usage .
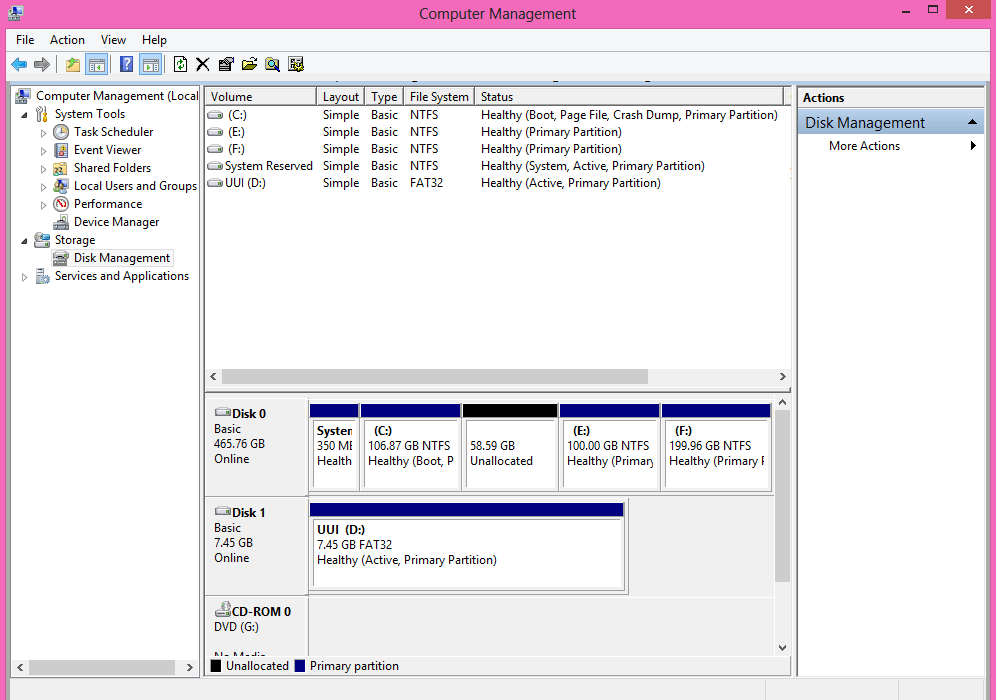
Here we Shrink 60GB for Kali Linux (Strongly Recommended Shrink Above 20GB).
Here in the image below you can see a unallocated space of 58.59GB(Shrinked space), it may be differ in your case.
2. Procedure to Shrink Partition using Gparted
It is the best way to install Kali Linux without any extra effort .
- Plug your USB Disk or Pen-drive having Kali Linux after universal installer process.
Restart your PC and Ensure that your computer is set to boot from CD / USB in your BIOS.
Take Boot from USB Disk or Pen-drive.

Chose Option LIve(amd64).
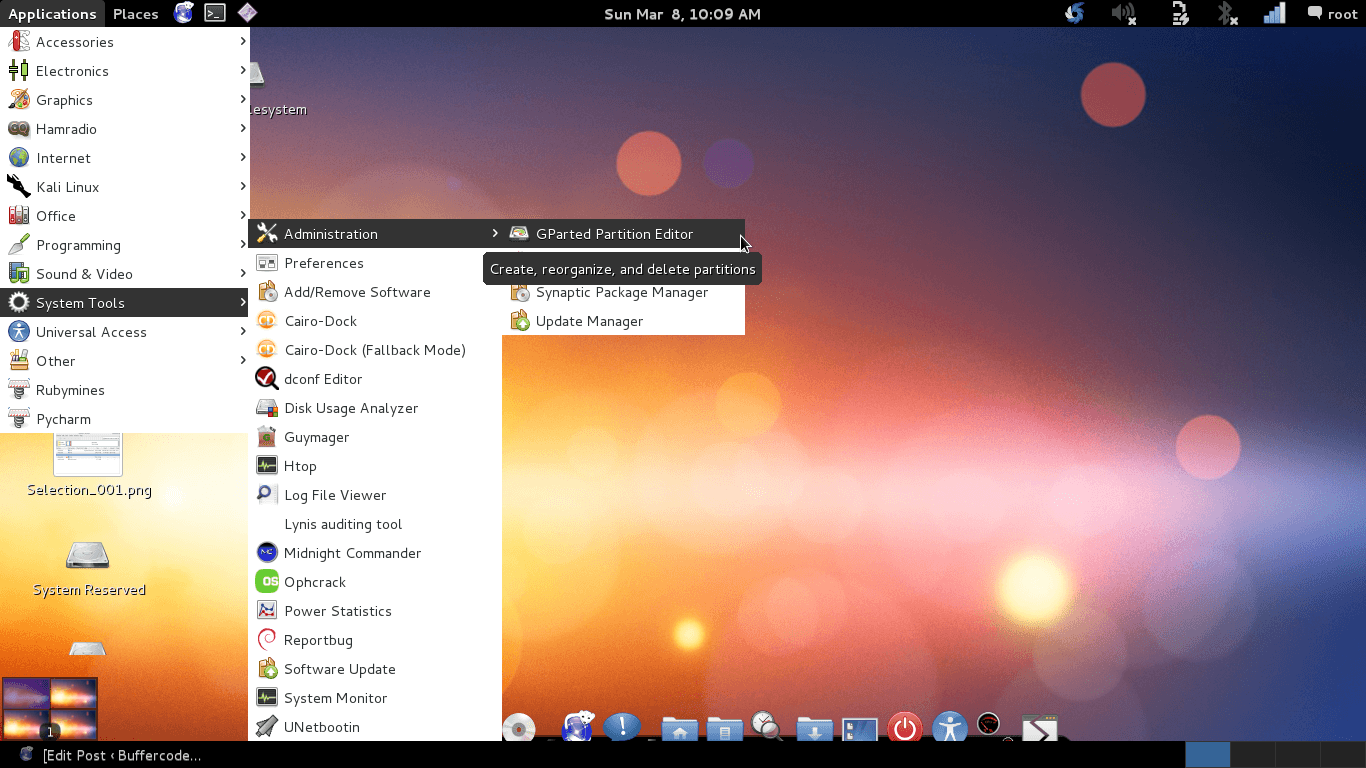
After running Live Kali LInux , go to System Tools>Administration>GParted Partition Editor and Run it (As shown in image).
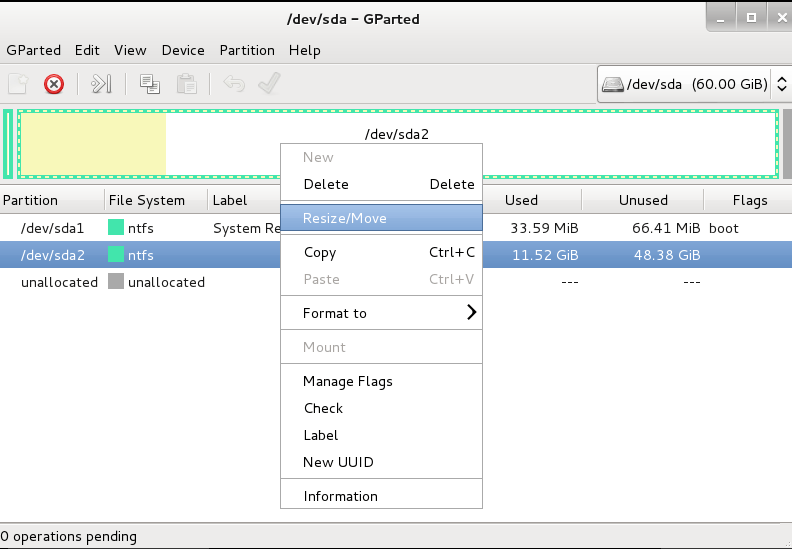
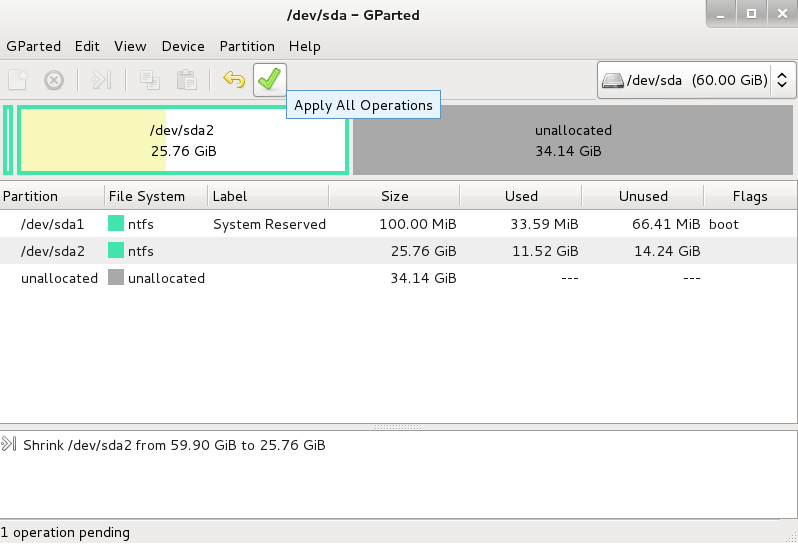
Resize your windows Partition according to your disk Space and click the Green Check Button below the menu bar on GParted to done(save) this operation.The New partition you have been made from previous one that can be unallocated (Note: Don’t format it).
Here i choose different System to show how to resize windows disk to create new partition.
After Following each step as described above you will able to create new partition. But if anyone not able to create a new partition for Kali Linux , you must be ensure that you have only two partition before resize because in a single hard disk you can create max 4-Partation .
Note: Max of 4 partition on single hard disk is allowed.
I hope now you will not get any difficulty in making partition.So now we should move towards our next step of Complete Guidance to Install Kali linux in Dual Boot Mode without any Problem .
Steps to install kali linux in dual boot
Problems in installing kali linux
Before install Kali Linux we recommend to run it live .Why ?? Because if you run install mode without running it Live some time Wi-Fi connection create problem ,if Wi-Fi is not connected you would not able to install Kali Linux ,because it will download some important package from its server.
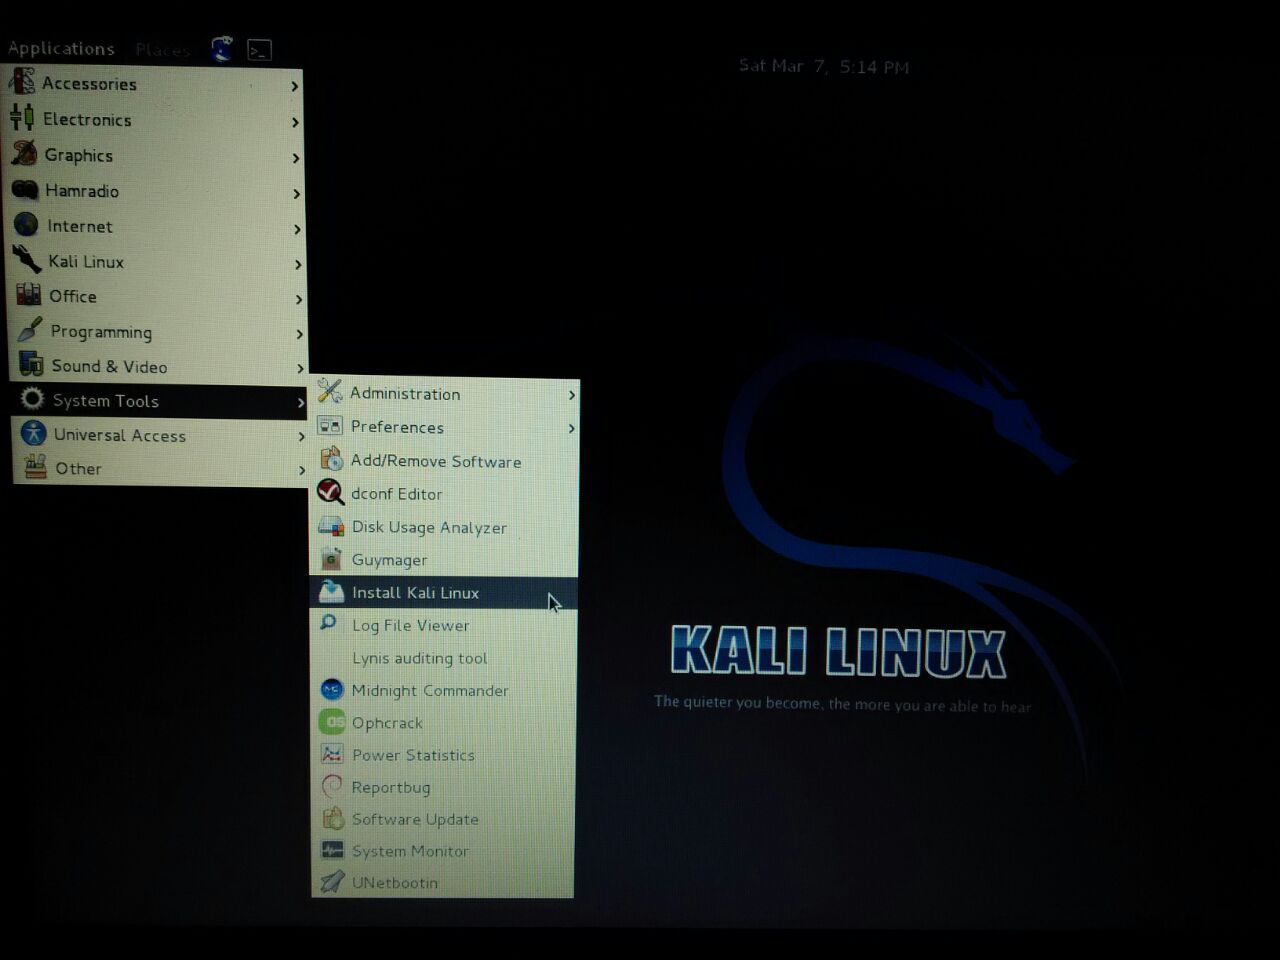
Launch its Installer in Application>System Tools>Install Kali Linux
 After the installer starts , chose your country , territory or area and press Enter or click to Next
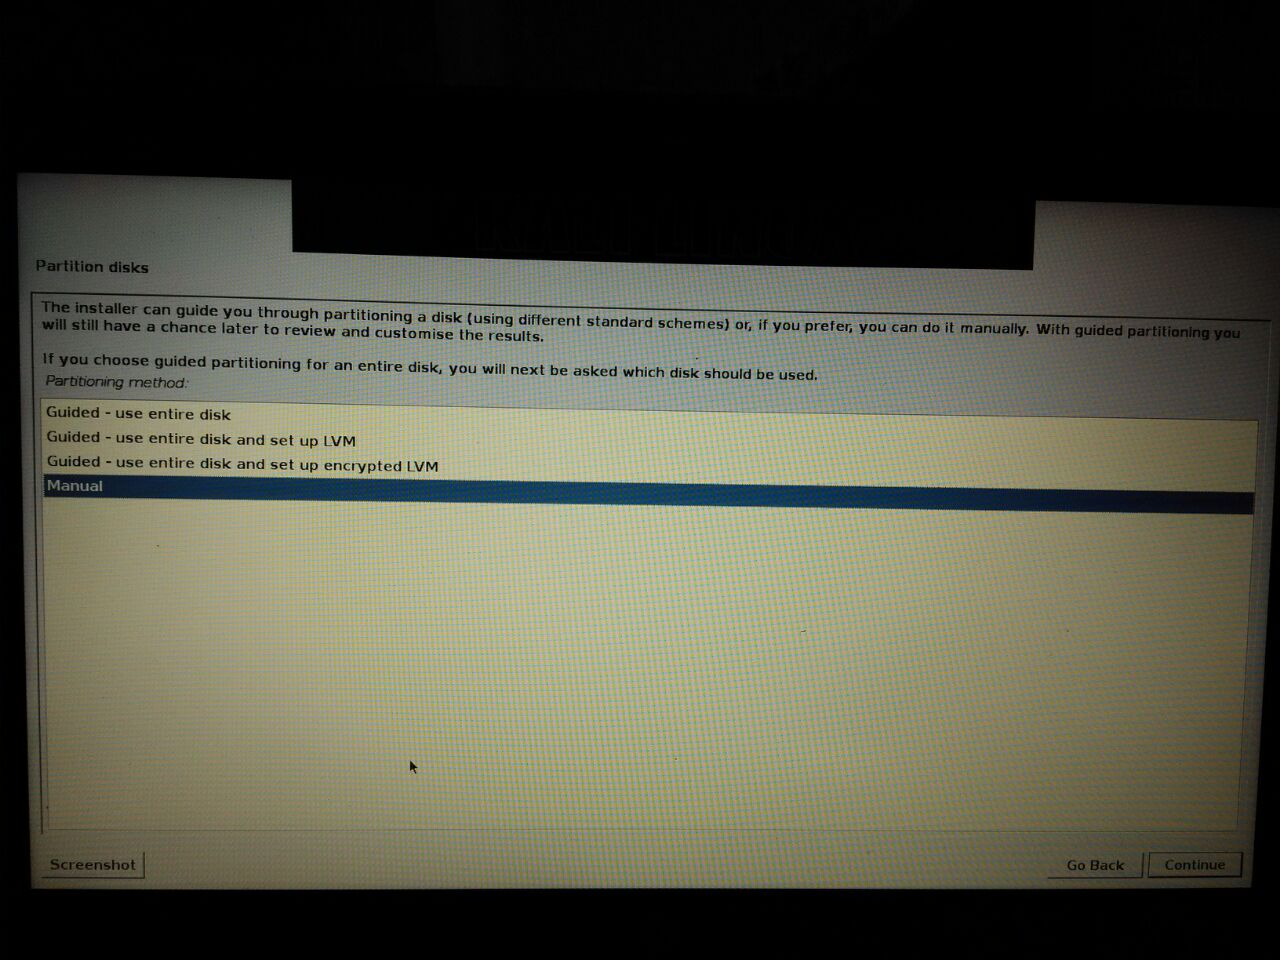
Select Manual, Partitioning method. if you choose other one some time installation will fail .
You should now see windows NTFS partition, the first two partition are for windows 8.1. Partition #1 is the EFI system partition,while partition #2 is C:\ Drive .Below that is an unallocated partition or space that was recovered from C:\ Drive.Let’s install Kali Linux on that free Partition. Click and Enter on that partition.
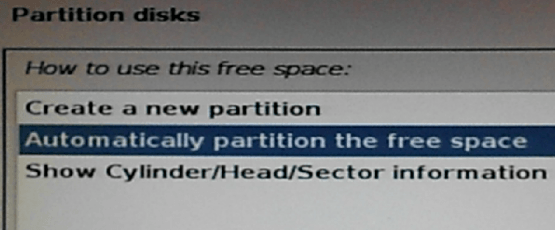
Select Automatically partition the free space.
Now you will decided how many partition the installer should create.
If you choose First option the installer will create just two partitions First one is root partition and Second one is swap partition or Space the first option is recommended for new users.
If you want to your home directory on a separate partition ,select the second option (Separate /home partition).
If you want to create separate partition for different directory select third option( separate /home , /usr, /var and /temp partitions).
Choose any option for your convenient. We select third option to create separate partition for different directory.
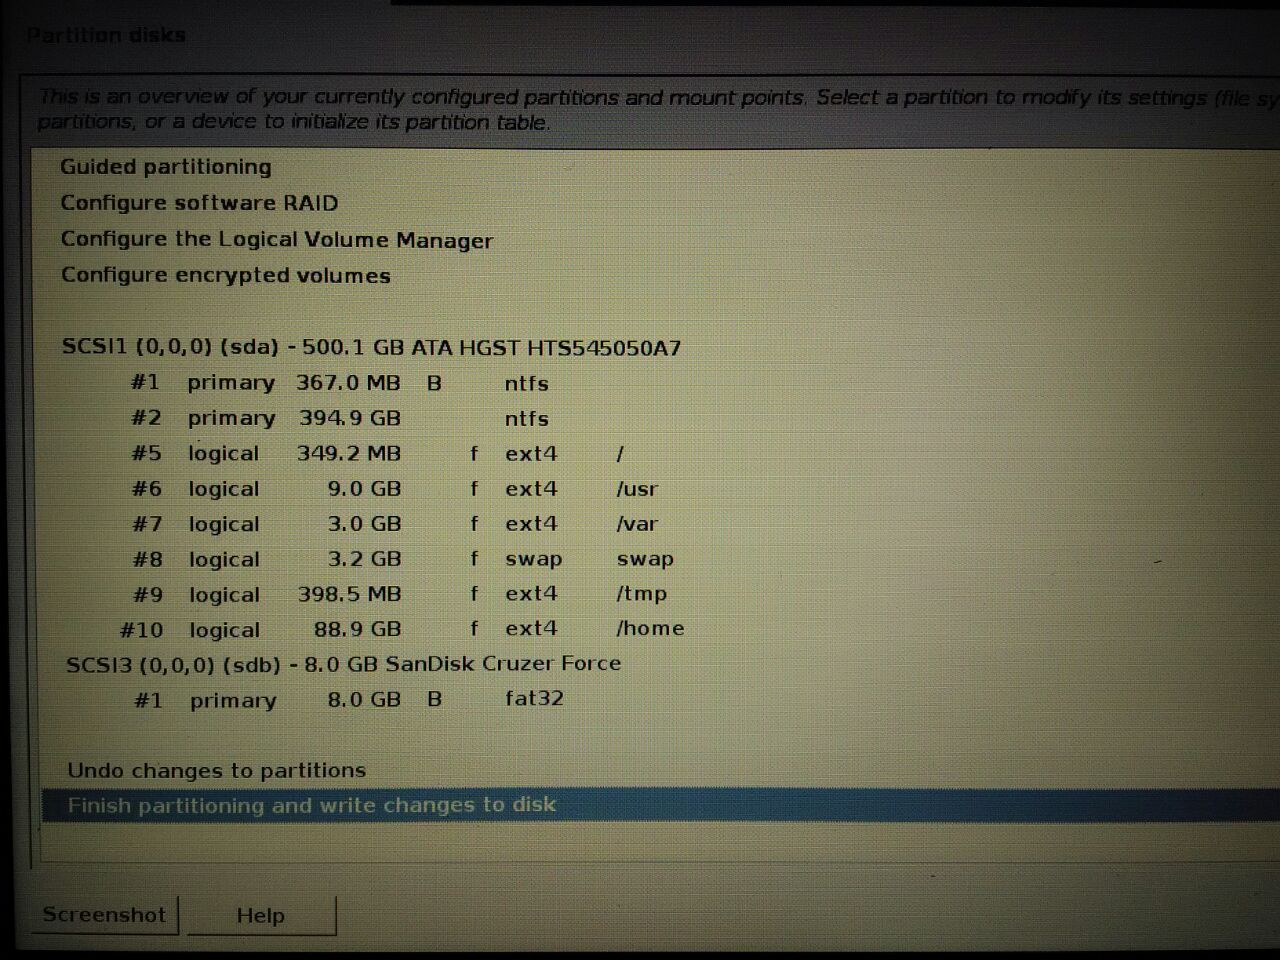
You can see Kali Linux installer create different partition for different directory. If you select 2nd option installer will create three partitions root ,swap and home partition.After creating partitions, select Finish partitioning and write the changes to disk.
Kali installer take 10-15 min. to finish the installation process
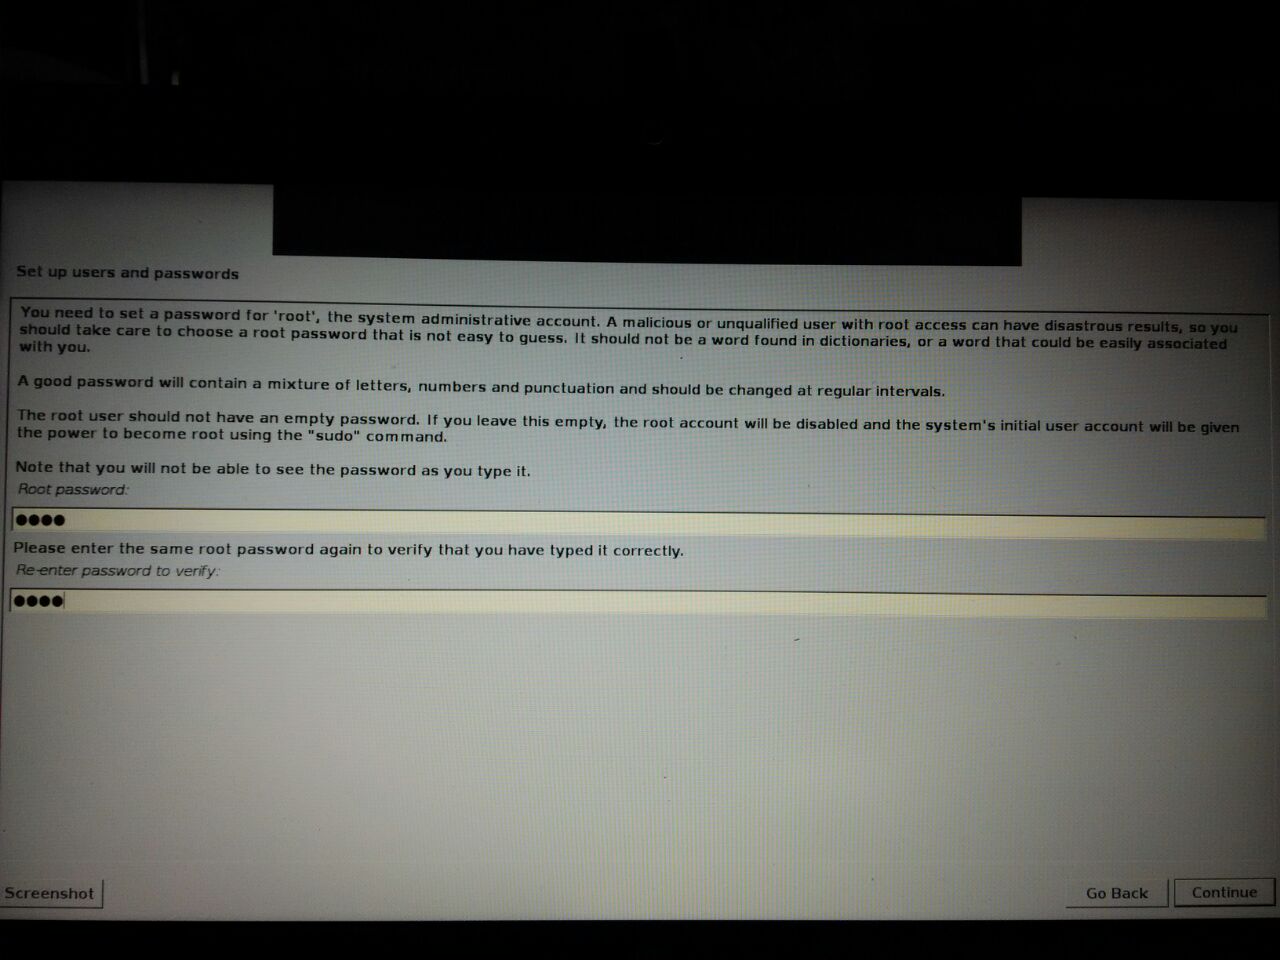
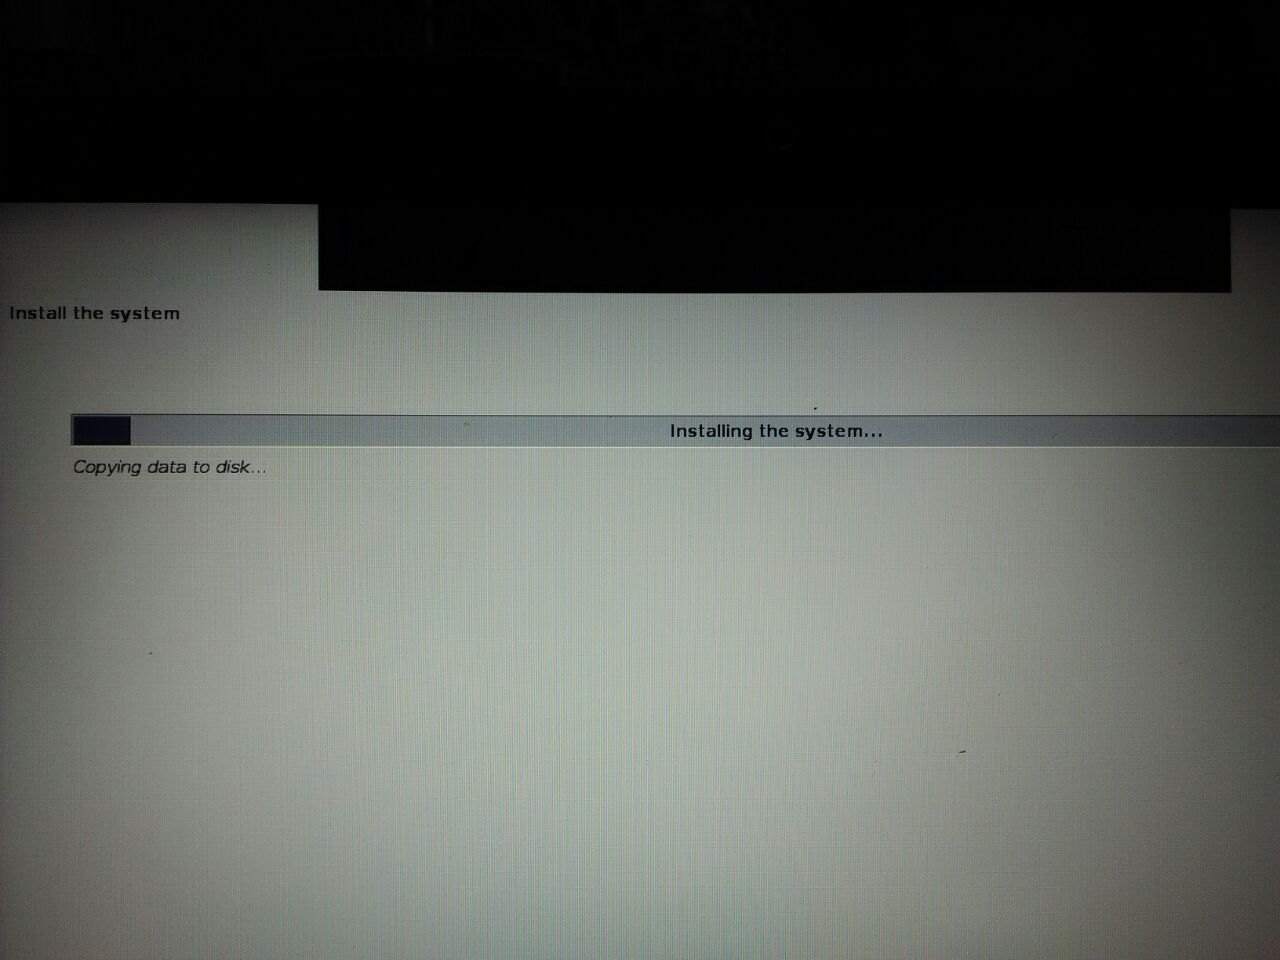 Once the installation procedure complete, Kali installer will ask to set up root password .Remember the root password you enter because after the all procedure will be completed it will ask username and password at a Login time.
Below is image of kali grub loader
Now just restart your computer and a screen as shown in below image will apear on your screen .Select Kali GNU/Linux(1st Option ) from the given options to start kali and select windows 8(loader) to start window . 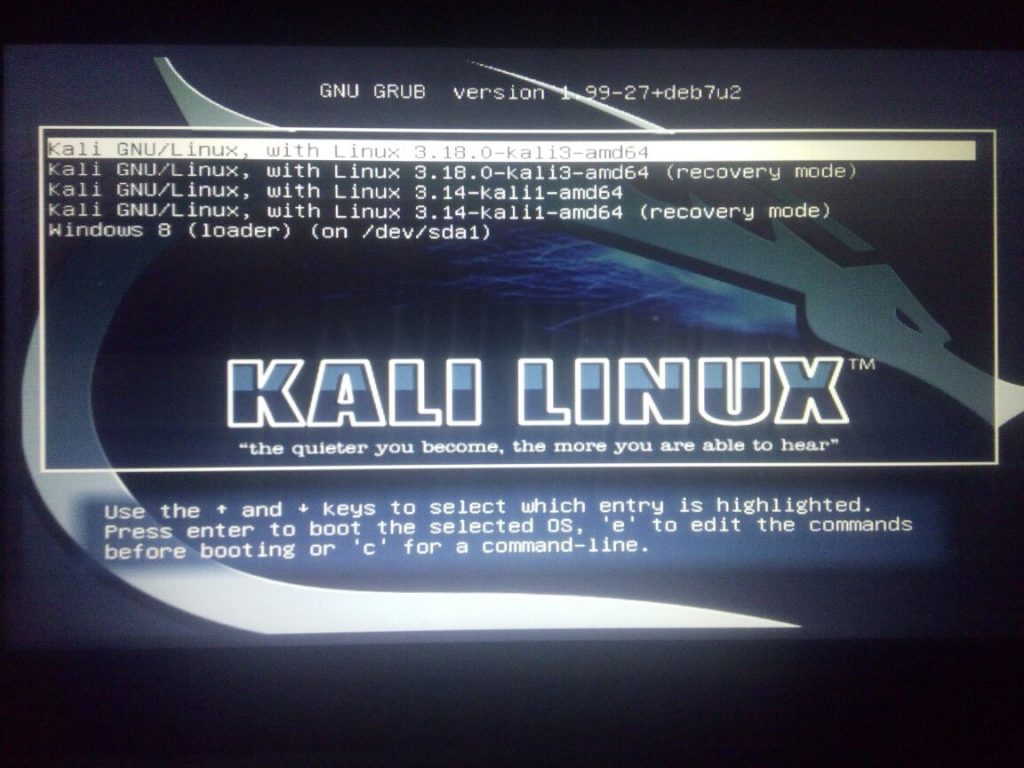
Now just enter root as username and your password to enter into the Kali Linux the rebirth of backtrack 😉
Wooooooooo Now you are into the best O.S for penetration testing .
Enjoy it, feel it, Love it and Just do it 😉
See Also:Important things to do after install kali linux
Have something to add or stuck somewhere?? Please share/ask in comments.
Follow us on Facebook, Google Plus and Twitter.










Kali linux support on lenovo g 570
Nice bro!!!
Comments are closed.